Monday, 25 November 2024

New washing mahine Bosch WAN28209FR

The Haier hw60-14829 drum bearings failed about 2 months ago. It was nearly 7 years old. I've heard some bad ones, but this approached a jet engine. Couldn't be in a room with it. I would have replaced them, having replaced the brushes in the last year. About 3 hours work. However, it's not particularly well made and has no out-of-balance detection. This means it slams around the kitchen units and we're not always in the house to sort it. There is also the mystery leak. Never found it despite a lot of investigation.

After a lot of looking around 6kg machines it transpires that only no-name or non-EU made brands are 6kg and nearly all of those are 1200 spin. The Haier is 1400 and that makes a difference in winter drying outside.

Finally plumped for the Bosch WAN28209FR which is 9kg & 65 litre, made in Poland. 9.1 on repair index and 380€ It's massive by comparison going from about 450 deep to exactly 600mm. This meant recessing some worktop brackets and moving the power and water. Drainage was fine. The only other problem was the control knob which they omit from their side elevation. The door is shown and I'd planned to remove that (easy - 2 screws). I ended up hacking the door frame. Thanks Bosch. Let's hope you do know how to draw and, well, follow the drawing to build your products.

It really is quiet, and the door opens almost flat. It leaked on the floor below the detergent drawer on the recommended drum clean, and it looks like either it over-foamed or it's condensation coming up the filler pipe from the drum. Other candidates are too high water pressure, but ours is pegged at 3 bar. Apparently quite normal. A run at 40C/1 hour wash later on was dry.


Saturday, 23 November 2024

12V PD car charger

 This is a really nice bit of work. Simple, using mainstream chips, and largely works as advertised


Thursday, 7 November 2024

CO emissions

 Using on-line calculators

1 flight from Tarbes to London 226kg (920km)

1 person drives 1000km in a diesel car 5l/100km 234kg

In a year we use 2MWh and buy 1MWh.

To buy 1MWh in France, typical emission is 45g/kWh or 45kg (45kg) 

Put another way, I can fly or drive 180km (45/226) with electricity that we generate/save

The return journey to the supermarket we use is 26km, which is 6kg of CO. After 38 weeks of just food shopping our carbon emission is the same as a flight to London.

Our ISP reckons we use 3.8kg of CO per month = 45kg/year, which is about 8 shopping trips.

Internet globally 3-4% https://www.anthropocenemagazine.org/2024/05/the-average-internet-user-spends-3230-hours-online-every-year-heres-the-carbon-footprint-of-that/

cement accounts for 8% of global emissions. The IET 9/24

World-wide military operations >5% France 2 climatologue 19/11/24

World-wide tourism 9% of global emissions,  11% of France's. France 2 climatologue 9/1/25

Agriculture 19% France 2 climatologue 4/12/24

Car tyres shed a quarter of all microplastics in the environment. The IET https://eandt.theiet.org/2024/11/29/car-tyres-shed-quarter-all-microplastics-environment-new-research-reveals


Monday, 21 October 2024

Kitchen drain blocked

 After 15 years the 10cm pipe from the kitchen sink wasn't draining quickly. Even the dishwasher was filling the sink. Too little washing by hand to push the grease through?

A drain snake cleared the block at what felt like a T with the utility.


Monday, 9 September 2024

Garage floor

It's been coming for a while. I built the new garage in 2021 and put on a coat of floor paint. I'd bought enough for 2 coats, plus a third (?) on the main garage floor. It's the amount of stuff to move that's put me off.


Yep, that's 2 trailers, 2 generators, homebrew boiler, firewood and a chipper. 1 trailer stayed in place!

Not too much outside for 2 days. It was economy paint from Leroy Merlin. It dried in 3 hours, but 48 hours are recommended before traffic. Even 2 months on, paint is peeling off where tyres are left standing.

Shameful packaging - or is it just me

 iLast care hyaluronic moisturising cream. 30mL

I use a tiny amount of this stuff, despite it's eye-watering price, it works for me. About 25€.

After 18 months it ran out. Well I thought it had. I took it apart and found a disgusting waste of plastic and packaging. A lovely design, but for fuck's sake, I need a finger to apply this stuff, so just put it in a pot and let me dab some on my finger. I cut open the 'empty' pot and carried on using it for 4 weeks. There are various type of plastic, O-rings, pistons. These parts will have taken precision moulding, so more expense and energy, in the manufacturing plant, design office, prototyping and consumer trials to name just a few.

Note it's stated open time is 6 months. Why? It has this totally over-engineered dispensing system that keeps it sealed. Well, it must keep it sealed as there is nothing to remove to start using it. It made it from the factory, with a use by date of a year or so, but once I press the dispense button, it magically has to be used in 6 months? Not a chance I'll buy this every 6 months. In fact, I'll now look for another brand in a little-heard-of thing called a pot.


Saturday, 31 August 2024

Stihl FS56C strimmer

Think twice if you're offered a seized small engine. If it's been sitting around a few months the petrol will have evaporated leaving gum everywhere, and you know how carburettors love goo.

So factor in a lot of cleaning of the crank etc, plus potentially a new carb. An ultrasonic bath might do it.

I got away without a bath, but it took 2 thorough cleans, and obviously I needed a rebuild kit.

All original parts. About 80€ and ~8 hours (strip + rebuild) to fix a 300€ strimmer.


Wednesday, 28 August 2024

The Deck (again)

Previous renovation

The deck went in around October 2011.

Quite a few beams to replace this time, plus all the uprights. The uprights have rotted off above ground. All the wood set in concrete is as-new. There is a rose and honeysuckle which have done a good job of pushing the pergola north

Of the 6 posts, 2 can't be removed due to the rose and the honeysuckle. The southern 2 (3) are both at 500mm deep and in with speed beton. The RH one thursday 22nd, the LH one saturday 24rd August. Of the northern 2 (3) the LH one has a decent socket 25cm deep and is anchored onto a large rock. The RH one was dug fresh (easier) and is 600 from grass, which is 100mm higher than the original.

The intention is :- southern end, link the 2 good posts with a chevron and attach the horizontal part as-is. No point trying to force the rose around; northern end, make Y pieces between the post and rail.

The concrete sets hard quickly, but like any concrete is at design strength in 28 days. After 7 days is nearly 2/3 full strength

Wednesday, 31 July 2024

Ryanair error message 'an error has occurred, please try later'

 A reminder to myself. This is the second time it's happened.

The problem. You want to add your passport details, but you have to add your name. However, when trying to add your own name to your account you get the message 'an error has occurred, please try later'

The first time this happened I spent ages on chat with Ryanair as they didn't know why. Finally someone worked it out. However, the utterly moronic fucking witless twats didn't update their website. This was years ago.

The solution? Go to the section marked travelling companions and delete your own name.

Now, the question to ask is why Ryanair thought that you would want to add your own name to your own account as a companion. The next question is why the dick that sets up the error messages did not put up something meaningful.

Saturday, 13 July 2024

Router UPS

We have a SFR/RED router and ONT. It takes up to 20 mins to connect after the shortest of brown-outs. It needs a UPS and I sort of have one. It's a house battery - see my posts on Victron. However, that won't keep stuff going during a firmware update, or if someone restarts the dbus....

Enter a UPS. The router has a 2A 12V psu. The ONT has a 12V 1A psu. Combined operating current is 1.3A max (15.6W) A Y-lead means you can delete the smaller PSU. That will save a watt or 2 vs 2 mains bricks. Turning off the wifi will save another ~4W (see later post on Asus router as why this matters)

A quick and dirty router consists of a 3S li-on battery scabbed from a very old Dell laptop. Added a 3S protection board and put it in parallel. The battery will have about 80% capacity at 12V. The discharge curve is pretty flat, and I only need protection for maybe 30s if I change supplies over.

The protection board will cut out a 8.1V and it will prevent excessive charge.  I'll need to test this otherwise there is a risk the battery will collapse the 12V supply.

Wednesday, 19 June 2024

Fibre comes to the village

Technically fibre came to the village last September, but when you have VDSL at 90Mbps, who needs fibre?  Over the following months the speed kept dropping. 60M last week. And increasingly intermittent, suggesting a broken core; the last time it dropped below 20M I got the ladders out and repaired the joints on the post which got us back up to 90M.

Long story short I approached the operator Sosh to ask if they'd negotiate on price. They wanted 31€ for 300M. RED wanted 26€ for 500M with 2 months free and install of 39€. The 2 free months covered the install. It was a long and frustrating conversation with Sosh. They kept telling me fibre wasnt available, even though I knew 5 others with it. Sosh online mapping for house selection chose not to use the official postal addresses in the village and instead thought that using the plot number off the cadastral listing and the place name would be better. After all, everyone knows that information from when they bought their house.  I offered to send them a screen shot of their map showing the house and the local fibre box. They told me to post it. Yep, in the 21st century an IT company didn't have an email address.

I terminated the conversation and signed up to RED. I was being lazy staying with Sosh, and part of me doubts they would price match for a worse speed! I should thank Sosh as RED had dropped their price to 25€ in previous 24 hours. This was Thursday. I booked the install for the following Monday. I got a call Saturday saying they were coming to install. They turned up, but their system showed that we already had fibre, and it was too late to pull a cable.

Monday comes around, and 2 hours later it was all done. I got outgoing phone calls immediately, but I had to wait until the following morning for incoming calls. 500M up/down. You also get 10G of cloud but it's too pitiful to use. I won't be using the email as I will probably be changing ISP again in the coming years and it's too much hassle to advise everyone of change of email. I'll stick with gmail.

Sosh have been helpful in cancelling the old contract. Their bill will be forwarded to RED!

13/7/24 Been playing with the router. It takes an amazing 20 mins to synchronise. 20 mins!!! I have an ONT + xDSL box that accepts a WAN. It looks like the ONT syncs every 10 mins and it needs 2 syncs before it connects. If you're lucky it will connect in 10 mins. Unlucky and you wait 20 mins. If you think that's bad, it takes around 2 hours for the VOIP in the box to reconnect.

See my next post for a UPS

On the plus side, repeated disconnects push the speed up. Currently got 920/417 4 ping and 7/13 latency.

Saturday, 8 June 2024

Battery equaliser NEEY

Got a NEEY battery capacitive 5A balancer. Also sold under the Enerkey brand

EK-C855A V1.3.1 - no data

Active chips Enerkey  EY8808S / 4E19C0 - no data found


Monday, 29 April 2024

Brauheld pro 45

Sold under a few names in 2024

https://www.klarstein.fr/Electromenager/Kit-brassage-biere/Brauheld-Pro-45-Kit-de-brassage-de-biere-maison-Cuve-45L-3300W-45-L.html

Klarstein - variable pricing, from 650 to 400€ depending on the offers

https://thehomebrewery.eu/equipment/breweries/coobra

https://www.homebrew.no/bryggemaskiner/1872/coobra-cb5-pro-v3-craft-brewer-all-grain-bryggemaskin-50liter

https://www.thehomebrewforum.co.uk/threads/coobra-cb5-45l-all-in-one-brewer.84124/


A slightly different model without the recirc line (might have an internal line)

https://brewtaurus.com/products/b45l-ss-brewing-system-pro

https://www.bmswijndepot.com/fr/catalogue/Details/4900/easybrew-sb60p-refroidisseur-60l

https://brouwland.com/en/electric-brew-kettles/20634-brew-monk-b40-wifi-brouwketel.html


Agape is the manufacturer.

https://www.youtube.com/watch?v=MlHV91AVzbY&ab_channel=AURONAGAPE


Bought this to replace a 70L stainless pot and 5.5kW gas burner. I will only be able to brew say 40L in the new boiler, but it will be a lot more efficient on electricity and the solar panels will contribute. Also, as it has a pump, I can do everything on the ground which is a big bonus for the back. No moving hot water or wort around in jugs. No wind blowing out the gas, or blow back! Hopefully no burnt beer too, given the enclosed element.

I've also made a counter-flow chiller so hopefully this will reduce brew times. I intend to use an old shower pump to borrow cooling water from the 1000L water butts, although some water will be fresh and kept for subsequent cleaning. See the dedicated post on that.

The tap is 3/4" to 1/2" quick disconnect male (QD) Readily available at Braumarkt, brauwland or Aliexpress.

The heat control is bang-bang. Shame, but it's a lot easier than trying to cool a triac in the proximity of a 3.3kW heater. 2 elements 1.5kW & 1.8kW - marked HY220 - nothing on goggle.

The controller is adequate and tells you all you need. Even though I think the temp calibration is spot on, I adjusted it to +2. This means that it actually switches off if you set boil to 100C. You could just set boil to 98C. In future I intend to set it to 98 for 2 mins @ 3.3kW, then the normal boil at 100C/1000W This will maintain the boil even if it is on-off.

PUMP FLOW RATES

Max water flow at top outlet is 5.6L/min which drops to 3.5L/min if bottom re-circ is fully open. 

Once the counter-fllow chiller is connected at the top, the water flow at top outlet is 4L/min which drops to 3L/min if bottom re-circ is fully open.  If the top tap is then 1/2 shut flow becomes 0.8L/min

Mods.

Using 10mm AC pipe insulation wrapped around. About 15m. Brewing jackets for the other brands above exist at 5mm thick for 30€ + delivery. I had the insulation lying around.

Extra silicon hose to extend the pump output to the top the grain bin during sparge. This is only needed if you don't want to batch sparge (not recommended)

Converted my old 50L fermenter to a sparge water heater. 2kW/220V heater and on/off heat controller STC-1000. A bit OTT, but I lose track of stuff being heated. The 2kW heater takes 2360W/9.84A at 240V which is still within spec for the controller 10A relay. It needs stirring occasionally for small quantities of water (<15) Heated from 50C (tank temp) to 78C sparge in about 15 mins.

A hop spider. Pricey, but the muslin bags are a pain, particularly to clean. Pellets might escape as I got a blocked bazooka.

Mesh bottom. A supplemental mesh on the mash tube, as the original one let a lot of bits through.  Don't think the grain was milled too fine.

Internals

Main pcb mounted in the base uses a AP8012 8W converter. Looks to be isolated output. https://forum.mysensors.org/uploads/files/1438113455710-_1286955514_oj99d4.pdf

6 pin connector to the head unit. Guessing 2 for power, 1 for a 10k RTD, 1 for buzzer and 2 to control each relay.

30A/240VAC Yongwei relay Y9F 112DM (heater power on)

10A/250VAC Yongwei relay Y3F 112DM (selects 1800W element, 1500W always connected)


A couple of wiring shots. The elements looks cast to the base, so a replacement will need to punch a hole in the side.


Display PCB. Red is 0V, black is supply according to the caps.


Trail camera

A few years ago we bought a trail camera to leave around the garden. It has a movement detector and worked pretty well. It takes 4 or 8 batteries and 4 decent alkalines last a few days. I quickly made an adapter for a 12V SLA battery, as it has a 6V external input but this was pretty inconvenient. The battery died, so I thought I'd check the power consumption.

20mA is taken, even in the off position, which is about 0.5Ah/day.

200mA whilst taking a photo 

Assuming 30s of photos/video, 10 times/hr = 300s x 24h = 7500s = 2hr x 0.2A = 0.4Ah.

Say 1Ah/day in total

By removing the 4/8 battery divider and some of the battery supports I found space to fit 2 lion batteries in series, a regulator set at 5.8V for the camera, and a charger, set to 0.75A. The charger needs to be > 9.5V in.

2 batteries in series are better than 2 batteries in parallel due to the larger losses in the step up converter.

As 18650 battery capacity tops out at 3.6Ah, even if you can buy 8Ah ones from some places, I picked some at 2.9Ah as they're half the price of 3.6Ah ones and only extend the camera life 12 hours or so. 

Using 2 x BAK N18650CL-29 should give nearly 3 days. Charge time from empty of about 4 hours. Battery protection with a small 2s pcb. Some notes as specs in the electronics folder.

It's a bit tight on the height, but it closes.

Original

At the top CC/CV charger, middle buck converter
2 batteries with the 2S protection pcb
2.1mm power connector


Tuesday, 23 April 2024

Counter-flow chiller

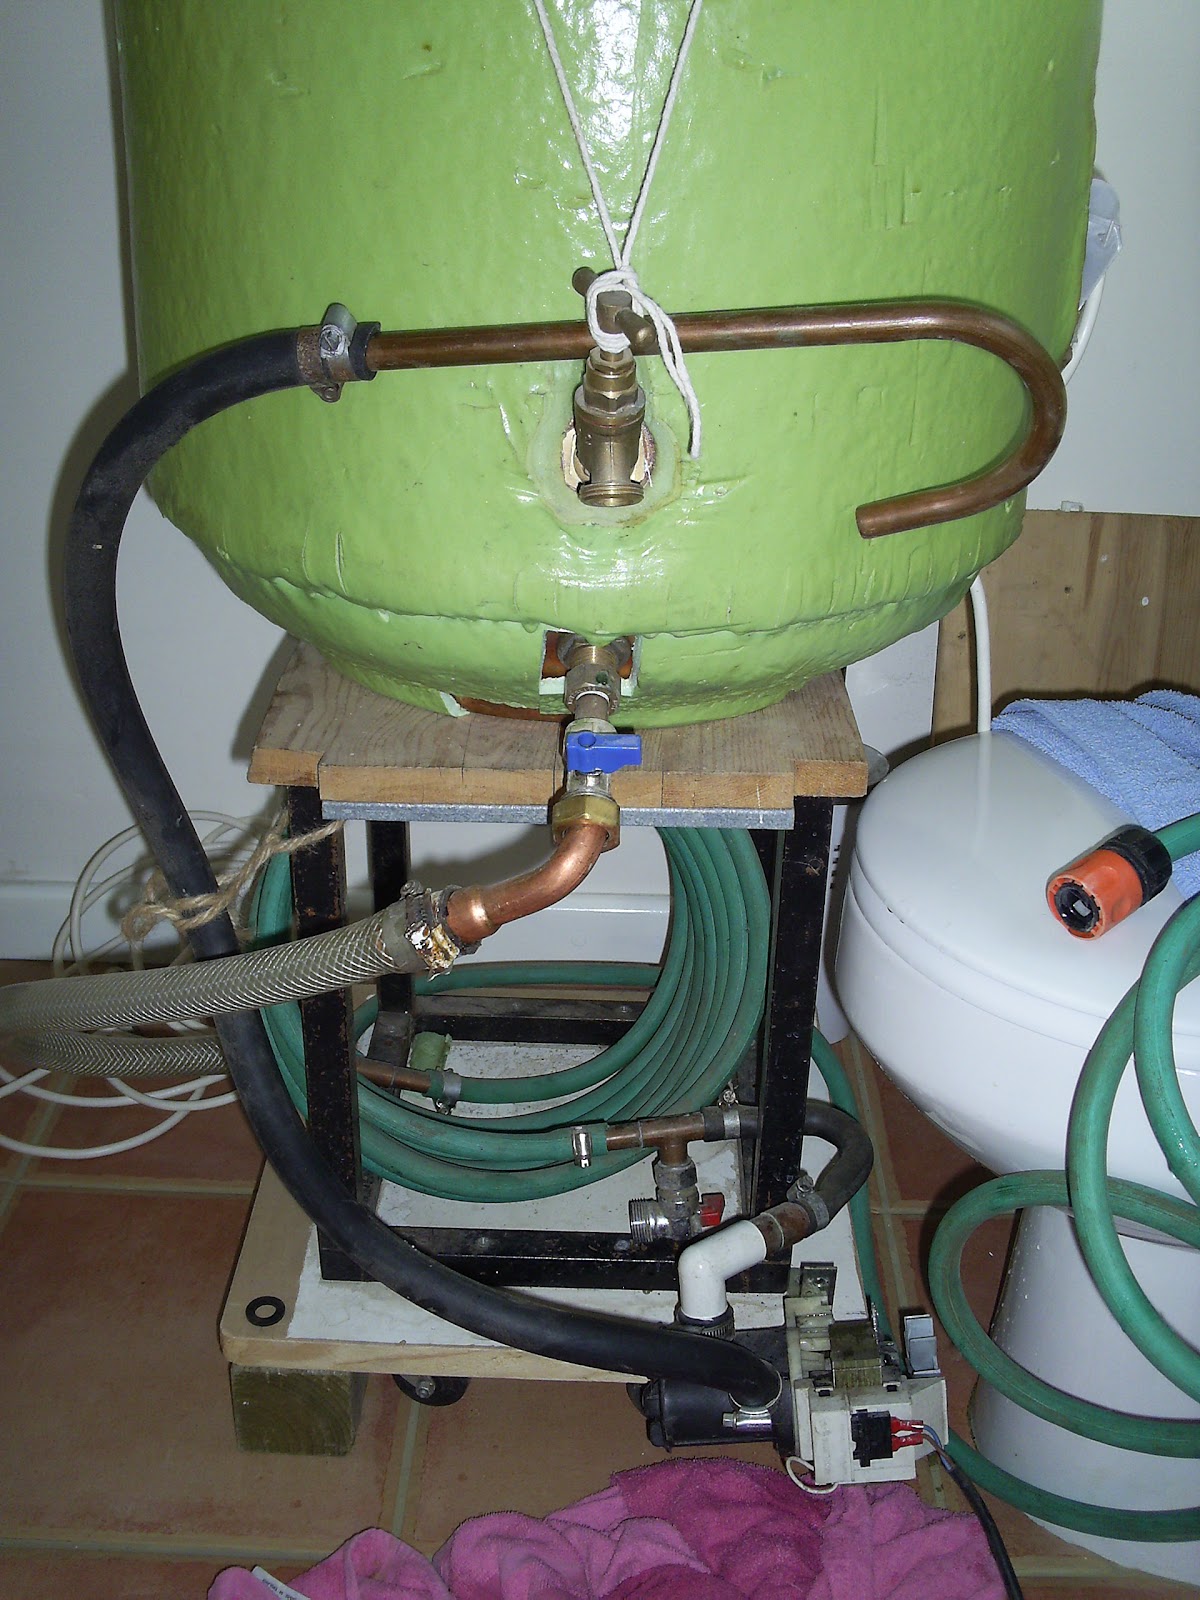
Back in July 2006 I built a counter-flow chiller using 1/2" hosepipe and 8m of 8mm copper pipe giving an area of ~0.2m2. Gravity feed wort, and a washing machine pump to pull the cooled wort into the barrels. This sat under the stand which held a modified 115L direct copper cylinder. It worked well from what I remember and I think it used less water compared to the immersion chiller.  I didn't really have much choice as I was trying to cool 85L of wart. I sold the lot in 2009. No notes, just a photo below.

I'd been thinking about a plate chiller as Vivor has a 40 plate at ~53€. More reading suggests they are a pain to clean well and block fairly readily. About 1m2 area.

Roll on 18 years to April 2024 and I'm rummaging in the garage. I see 7.6m of 22mm polyplumb pipe I'd removed from the house last year and 2 x 4m coils of 12.7mm OD ac pipe I'd been given. A few hours later my brain says counter-flow chiller. Approx 0.32m2

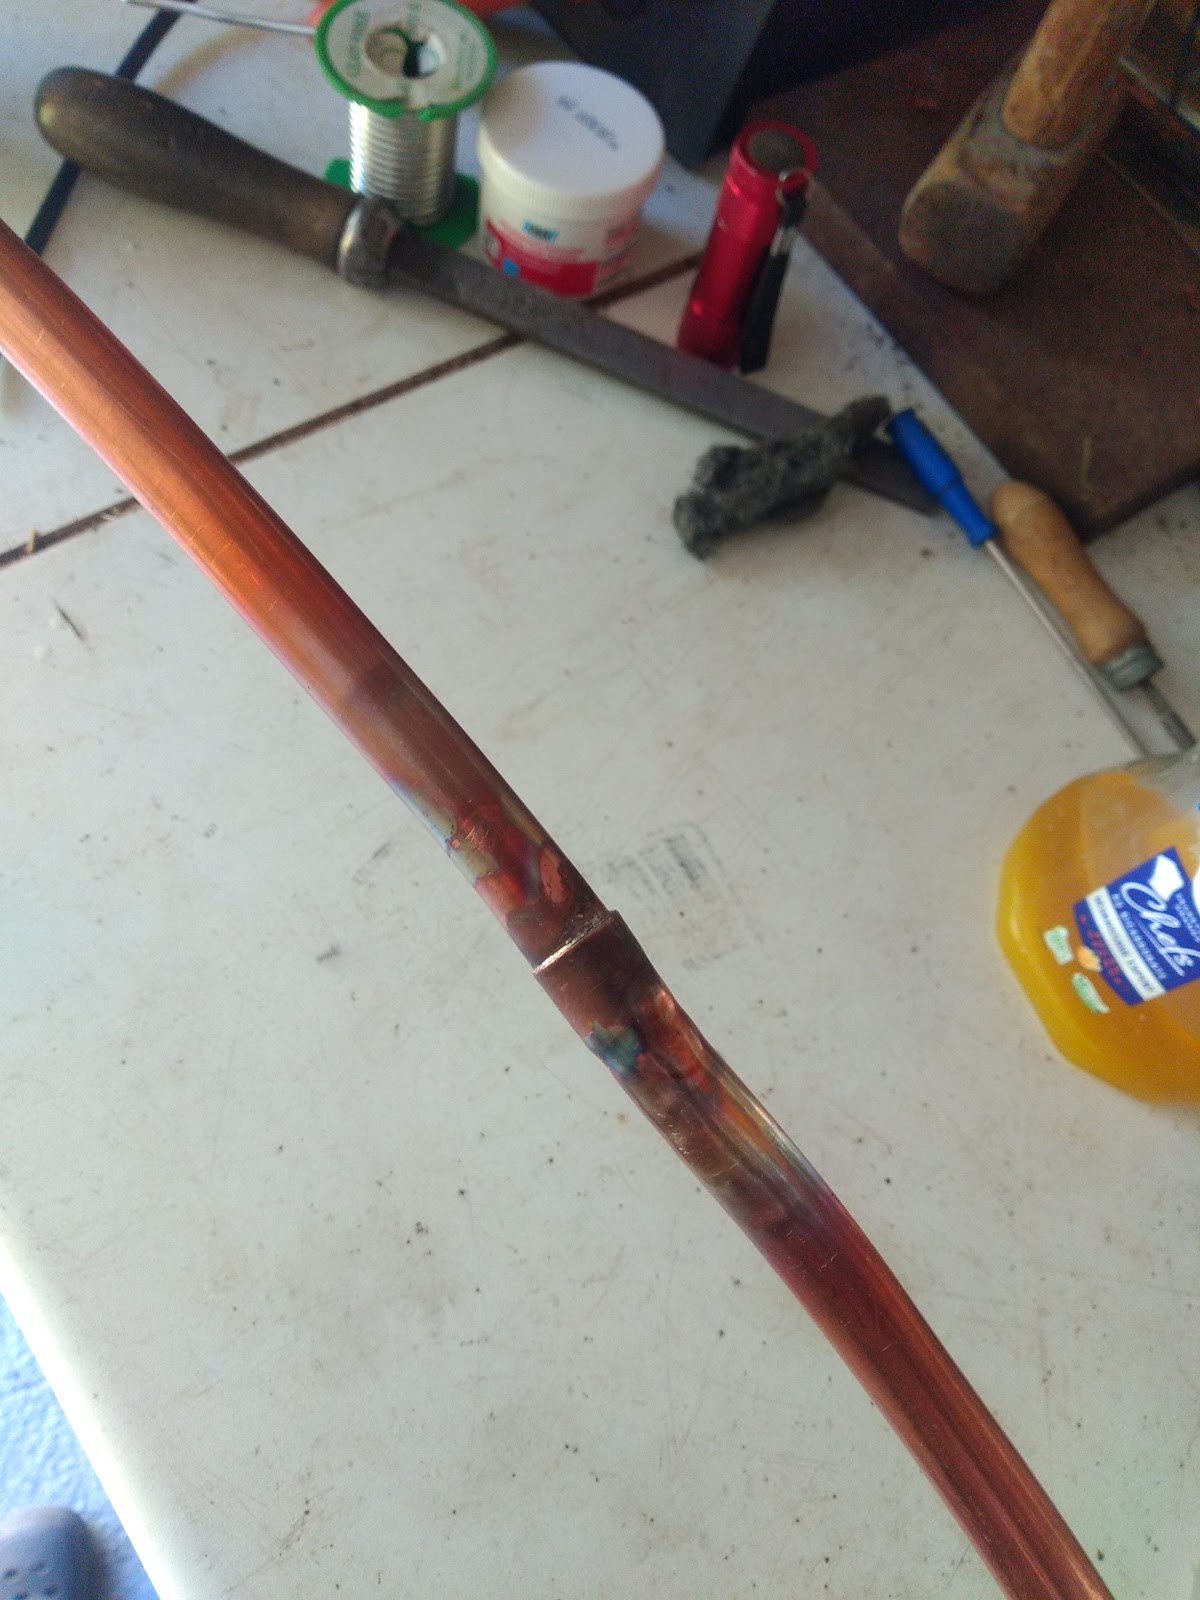
Twisted approx 14m of 1.5mm copper wire (od ~1mm) onto the pipe and soldered every 2m to create turbulent flow. Must break up laminar flow for best cooling. Didn't pass through the polypipe insert at the copper joint (flared out pipe). Cut and re-soldered wire. Pipe inserts restrict CW flow. Cant increase opening. Used plenty of cable lubricant. Lead free solder and new flux for the join. The rest was lead solder which is lower temperature and better flow for non-standard work. Wet rags kept the heat off the plastic. 

The wort outlet at the bottom is a 22mm right angle compression to 3/4" BSP with a 12.7mm hole drilled to allow the wort pipe to pass through, then soldered. After being coiled up at a diameter of 502mm (to make it fit with both inlet and outlet at the right place) it largely self held, but it's pinned into a frame. Then a 22x22x15 compression was put on the other end (the wort inlet). It would have been a equal T if I'd had one that also had a 3/4" thread. A 22x15 reducer was soldered into place to terminate wort pipe. A old piece of 1/2" copper provided the reduction from 15mm to 13mm. 1/2 to 3/4" fitting gave a water connector. The wort inlet slipped nicely onto some silicon tube that goes to the boiler. The wort inlet had another piece of 15mm reducer and a 1/2" BSP female for the connection to the pump.

3/4 BSP fittings are for the cooling water. All tested to 2.5 bar. The polypipe has a min radius of 8x22mm = 176mm. Settled for 250mm as it is tricky stuff to handle. The copper was soft annealed and was already in a 400mm diameter coil. The polypipe is good for occasional 100C.

Have now tested both circuits with pumps. The output of wort circuit needed to be higher than the pump inlet as it's not self priming and not particularly good at sucking. A few blocks sorted that. I also added a top the same as the base (old cable drum) as this gives me somewhere to stand the sparge water heater which also needs to be above the wort pump inlet. 

While watching another hobby brewer I saw that he'd connected his counter-flow chiller to the top outlet pipe. I've tried this and it is better for several reasons. Primarily, the pump inlet is connected direct to the boiler, so no dry running and it can re-circ to begin with. Secondly I can regulate the chiller flow by opening the re-circ line, and then close the top tap a bit if needed. Flow is 4L/min just at the top, which drops to 3L/min with the re-circ open. Down to 0.8L/min with the top tap 1/2 open.

The cooling circuit being fed via an old shower pump from the water easily managed to lift the water 1.5m back to the butt at about 6L/min. I've read that the wort rate needs to be half the cooling, so 3L/min will cool the 40L of wort in 40/3 mins = 13 mins. Happy with that, but I suspect the flow from the wort pump is much less.

3/5/24 A live test. 20L of wort in about 15 mins, using 40L of mains water. Over cooled at times, but settled down with a few tweaks. Outlet water was warm - say 45C. CFC used on pump outlet which was throttled back a bit to save cooling water.

Roll the chiller to empty out the water when done.

Pressure test of the finished coil

Warming polypipe in the sun

Joint at 4m

wrap of copper wire ~100mm

If I do this again I'll probably get 20mm PER which is also rated to 100C. The fittings are either crimp or slide and I'd look for compression onto the copper.

Back to 2006

First attempt at the counter-flow chiller

Washing machine valve put in right at the bottom of the boiler to get the wort out. CW IN front right, meaning the hot water out is the hose pipe just visible on the right. Crystal/braided hose for the wort in. The copper hook is the wort out to hang on the barrel. The tank is about 47cm diameter, putting the chiller at about 30cm. ID of hosepipe is 12.7mm, so a 10mm copper pipe sounds too big. Assuming 8m of 8mm pipe this gives an area of 0.2m2. A 10mm pipe would give 0.25m2.


Research. Some notes on NAS

NB If using plastic/rubber outer be careful not to block cooling outlet / too high pressure else could rupture.

http://www.theelectricbrewery.com/forum/viewtopic.php?p=327899 some theory

https://www.thegatesofdawn.ca/wordpress/homebrewing/wort_chiller/ tuto

Other chillers

https://fr.aliexpress.com/item/1005002900523594.html Rubber

https://www.kegland.com.au/products/coolossus-passivated-stainless-steel-counter-flow-chiller-heat-exchanger

https://brouwland.com/fr/refroidissement/20087-refroidisseur-a-contre-courant-brew-monk-counterflow-chiller.html

cools 20L to 20C in 5 mins. 9.5m 10mm SS 

From a review : wort pipe 10mm od (0.3m2 area) , water pipe 14 id


Wednesday, 21 February 2024

Pond (again)

 On the 4th May 2013, we built a pond using a 4x4m underlay and liner. The pics are here

G:\photos\Garden\Pond\Construction


We'd been suspicious that it was leaking for a few years and finally bit the bullet and changed the liner. About 100 common newts, 7 marbled newts and 3 midwife tadpoles were temporarily re-homed along with a lot of other wildlife. The old liner did have a hole - looks like a mouse. The old liner was a woven affair with a plastic coating. The UV weakens it and it can then tear if pulled.

However, we also had a natural spring and this, along with heavy rain was pushing the liner out. 50mm of hardcore at the bottom got rid of the soggy clay. A 8cm drainage pipe was dug from the bottom to let any water out. EDPM 1mm liner and 300g/m2 underlay.

Carried about 600L of rain water up, plus say 300L from the temporary pond got the level approaching the top. Temporary pond followed the contour of the land and was a new 3mx3m tarp. Boards and concrete blocks (~10)


https://boutique.aquatiss.net/bache-bassin/200002-bache-epdm-bassin-feutre-protection-300gr-etancheite-bassin-baignade-naturelle.html#/200002_dimensions_epdm_bassin_1_mm-4_57_m_par_5_00_m

EPDM bassin 1 mm + feutre de protection PECT bassin 300gr/m² (certifié CE)

Largeurs de l'EPDM : 3,05m  / 4.57m / 6,10m / 7,62m 


Largeur du feutre géotextile : 3 ou 6 m. Le feutre est découpé dans la longueur.


LA BACHE EPDM BASSIN

L'étanchéité pour bassin en bâche EPDM (éthylène-propylènediène-terpolymère) est un élastomère (caoutchouc synthétique obtenu par polymérisation) qui offre une très grande élasticité (400%), même à basse température.


Utilisations 

La membrane EPDM est utilisée comme système d'étanchéité dans la réalisation d'un bassin de jardin ou d'une baignade naturelle. Elle est posée sur un feutre de protection 300gr/m² pour la protéger des éléments du sol pouvant l'abimer.

Avantages

Grande élasticité

S'adapte à toutes les formes de bassin

+ économique qu'une coque préfabriqué

Durée de vie : 50 ans

Résistance anti UV / rayonnement / ozone / oxydation

Installation : toutes saisons.

Installation

On peut envisager une installation en plein hiver, elle reste tout à fait malléable et garde ses propriétés mécaniques jusqu’à -45°c.

Sa longévité est garantie pendant 20 ans.

Ce produit est recyclable, il ne dégage pas de produit toxique à l’incinération et reste inerte dans l’eau, le sol, et à l’air. Le collage s’effectue par vulcanisation à froid.

Découvrez toute notre gamme d'accessoire pour l'assemblage et le collage de votre membrane EPDM.


GEOTEXTILE DE PROTECTION 300gr

Géotextile non tissé en polyester coloré, aiguilleté et calandré. Produit sans utilisation de liants chimiques.

Feutre de protection certifié CE PECT300   300 gr/m² en différentes largeurs.


Les géotextiles de protection sont utilisés pour protéger principalement les systèmes d’étanchéité tel que les géomembranes, bâches de bassin, liners de piscine, complexes drainant, et tous autres matériaux ne pouvant pas supporter les agressions plus ou moins prononcées des sols, des bétons ou tous types de matériaux poinçonnant. 


Caractéristiques 

Marquage CE, 

Couleur : grise, 

Fibres polypropylènes insensibles et résistants aux agents cryptogamiques et fongiques.

Résistance à la traction : 15 kN/m

Résistance au poinçonnement dynamique (mm) 15 mm

Résistance au poinçonnement statique pyramidal (N) 200 N

Résistance au poinçonnement statique CBR (kN) 2,20 kN

Vous pouvez également commander ce géotextile seul dans notre rubrique "Feutre de protection bassin". 

Friday, 9 February 2024

Bamboo

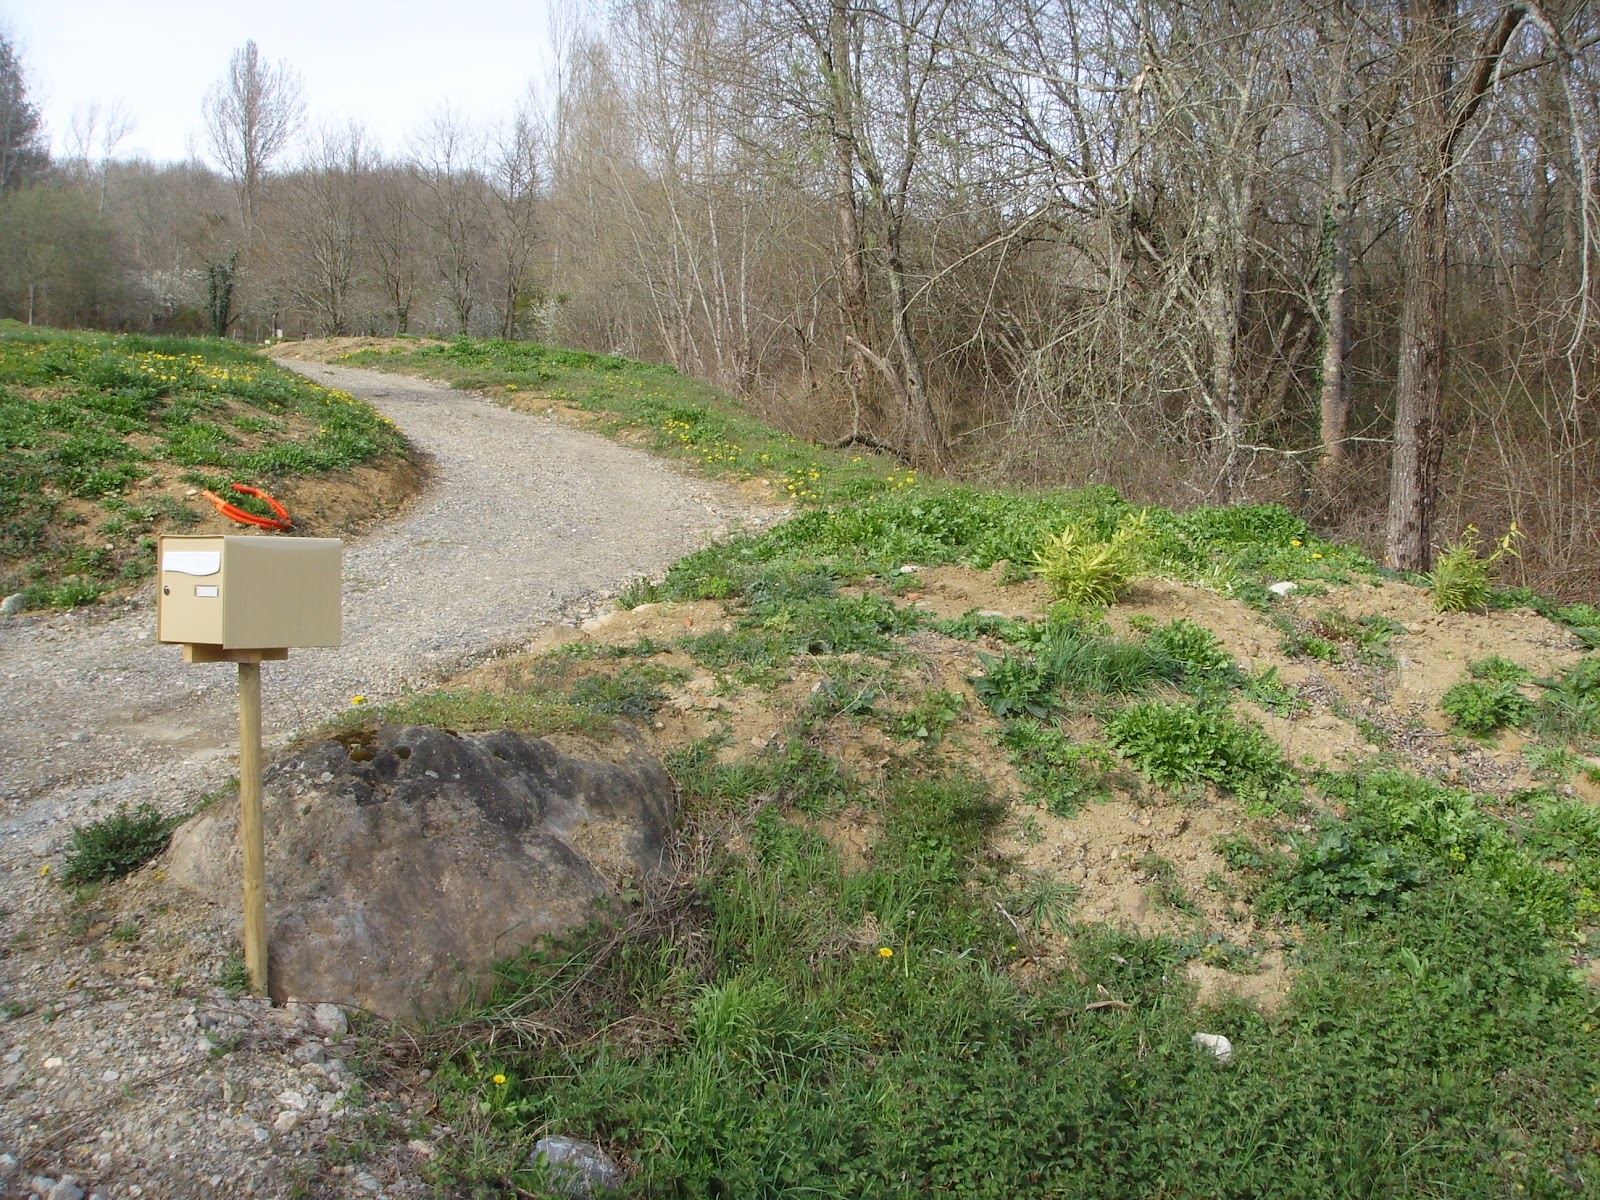
Kind of regretting planting bambou phyllostachys bissetii (just found the label) in March 2010. It was such a sweet little plant and we're sure it said it wouldn't spread much. It's now about 10m x 4m. It is classed as a running type as opposed to clumping. Some sites describe it as a vigorous runner, but that doesn't seem to be the case for us on clay in southern France.

Every year we remove new shoots and it's usually several hundred. 2023 gave ~560. 1 popped up in the middle of the drive, so I felt it was time to investigate. A trench revealed 8 rhizomes under the concrete drive.

There is no commercial product to kill rhizomes (possibly stump killer) and glyphosate only works on leaves. We'll be chopping the rhizomes off and watching for new growth.

 Almost every year our neighbour has told us a story of bamboo appearing in his house from his neighbour on the other side. Luckily it's a long way from his house...

I've just dug a test trench and it looks like I'll 'only' need to trench down to 0.5m to install the barrier. The soil is almost normal there and from the 2010 pictures it is firmly clay.


20/3/24 Dug a trench about 13m along all around the bamboo. Had to cut out 3 large parts, one towards the ditch and 2 towards the large rock. I had originally decided to trench more towards the drive, but decided that the level changes would be too tricky to bend a barrier around. Bought a 1mm barrier from here https://barriere-anti-racine.com/sol-standard-1-mm/126-569-barriere-anti-racines-eco-1mm-speciale-bambous.html#/33-rouleau-050m_x_25m. Even at 1mm thick it could be fairly readily creased and pleated to keep a slight lean, and still go around corners. 69.49€ delivered.

Barrière anti racine ECO 1mm spéciale bambous
Référence : JAR_BA_50_10_25_R
Polyéthylène Haute Densité (PEHD), noir, 100% recyclable, densité 940 g/m², épaisseur 1 mm
Got 16m of barrier and had some spare. Angled slightly, and back filled just as a storm started.
Found the 10cm outlet pipe from the fosse at 45cm deep on the uphill side. The join is about 20cm to the right of the pipe. Didn't find the pipe at the other side.

31/3/24 removed 10 shoots outside the barrier ditch side. 3 good size ones inside.
4/4/24 removed 35 in last 2 days. A lot inside the barrier
5/4 54 removed. 2 out of reach.
14/4 Kind of got bored of picking shoots, so spent an hour or so over the last week digging out the remaining clumps.  I got lucky with a few into the ditch that were thin. I now have a very impressive pile of rhizomes drying in the sum before I knock off the soil and return it to the increasingly holy area around the bamboo. Today I dug some more out that sprouted including a stealth one that had mad it half way to the road.
23/4 found another 2 stragglers today. They grew 15cm overnight. Not particularly long and had been cut off from the mother originally. New growth inside seems vigorous and has in some places exceeded the existing height of approx 1,5m. 1.5m at the rear, ~2m at the front was chosen last year as easier to maintain and get the bramble out.
27/4 A final (!) shoot with tiny leaves, and very short. It led to another few which had been severed from the main plant and were just below the surface.

Bamboo was beyond the 3 rocks bottom right

Ditch to the left. This was all bamboo.
Plenty of new growth inside the barrier to the right

Plenty of new growth

Originally it went from the left of the large rock and down the slope to the right


Research sites

https://bambouenfrance.fr/racines-bambou/ table showing root depth (to ~40cm but phyllostachys bissetii  not mentioned)

https://lewisbamboo.com/pages/controlling-bamboo trench to 45cm generic bamboo

https://www.gardenersguild.com/5-things-to-know-about-the-bamboo-plant
tough horizontal bit is rhizome. Thin bits are roots.
Like the roots of other non-rhizomatous plants, these are the soft, white, fibrous tendrils that creep down into the dirt. In bamboo, the roots tend to emerge from the nodes of the rhizomes. While the rhizomes spread out and generate the growths that will become new shoots and culms, the delicate roots mainly grow downward and are responsible for drawing water and precious nutrients out of the soil.
https://bambubatu.com/bamboo-anatomy-9-parts-of-the-bamboo-plant/

https://www.houzz.com/discussions/1735570/phyllostachys-bissetii-clumping-or-runner
'Most definitely, positively, NOT a clumping species. '
no need to remove rhizomes - they die.

Sunday, 4 February 2024

Hedge

 Cut the neighbour's hedge near the log pile and the bamboo